Have you ever felt unsatisfied with the default set of fonts that you have on your computer?
You have an idea how to design this or that on your website, and you scroll through the default list of fonts, but no font fits with your site design. In this short tutorial, I show you how to install new fonts: Windows 7/Vista/8. And how can you create cool looking images using those new fonts?
If you knew how to make $1200 a month online, from the comfort of your home, would you do the work?
It’s FREE to get started, too (no credit card required). You’ll like that part…
1. Using Fonts
The excellent news is that tons and tons of free fonts are available on the internet, and it is easy to install them on your computer. But if you search for fonts, I suggest using True Type Fonts (TTF) as they are the most common fonts on both PC and Mac.
Note! When installing new fonts on your computer, you have to be careful where to use them. You may have all these fancy fonts on your computer, but most people worldwide still have only default fonts.
Listen! If you use your particular downloaded font for a paragraph style or headings of your blog or website, you quickly run into problems!
You have this font on your computer, but other people don’t. You design your site using this particular font, spend time and energy, and the final solution may look exceptional. But other people won’t see it! Their computers miss your fancy font, and some standard default font replaces it.
Therefore, your website may look cool for you but weird for others. That is why you should avoid using those fonts in your paragraph style and headings.
2. Where Can You Use those Cool Fonts?
You can still benefit from those new fonts that you have found on the internet. The best place to use them is images. The text is converted into image pixels in the pictures, and there is no need for the font file.
So instead of using only stock images from the internet, you can design your photos, and this way, give your blog a cooler and more personal look.
3. The Secret of Handwriting.
Did you know that handwriting draws peoples’ attention even more than photos and images? It is true, and this is why you find more and more handwritten texts and arrows in blogs, websites, and magazines. Learning this fact, I thought to try and draw a few handmade images using a real (physical) ball pen and paper. Here is an example:
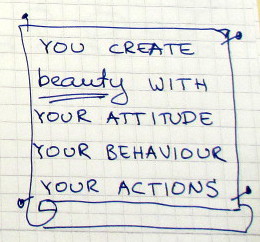 That was my initial idea. Soon I found a few problems, though.
PROBLEM #1. I was not satisfied with my handwriting. When I was in school, I did some work with my handwriting, but I was not particularly excited towards improving it. Now I have to live with what I have, lol.
PROBLEM #2. The bigger problem is that I could not get a satisfactory quality of those images when making them digital. I did not have professional equipment to do that, and as a result, they didn’t look quite professional either. They instead look like amateurish work.
As I want to give my blog a more professional look, I decided to design my images right on a computer. To do that, I needed some good fonts.
4. Install Fonts: Windows 7/ Vista / 8.
You can search for free True Type Fonts (TTF, with .ttf file extension) or go right to the Fontsquirrel website. Here you can scroll through the fonts or, by using tags, find and download whatever fonts you like. They come in .zip files, so after downloading them, you have to unzip its folder. Let’s say you like the font “Daniel.” It’s a nice font imitating casual handwriting, and you want to install it on your computer.
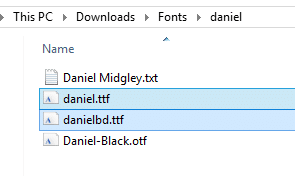
After downloading and unzipping the folder, there are four files in it:
You only need the files with the .ttf extension because these are the font files. In this case, the first file refers to a regular font style and the second file to bold style.
Keep this folder open as we need to copy-paste these two files into a different location.
4.1. Open a Font Folder Windows 7/Vista/8
Now go to the Control Panel and find the Font folder:

Click the Fonts icon, and you will see the list of fonts that you have installed on your computer: 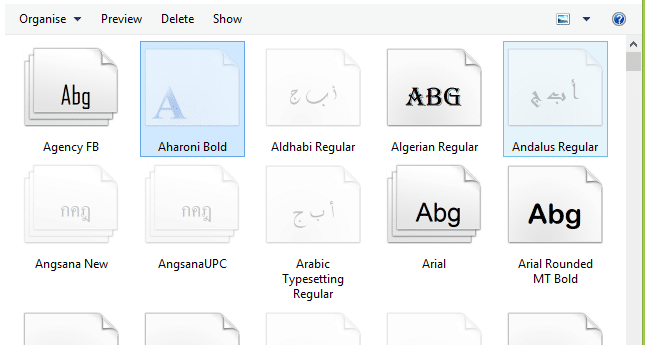
That is the place where you can manage your fonts. You can install new fonts and delete those that you don’t need.
Now using Ctrl-C (copy) and Ctrl-V (paste) or copy/paste functions of your mouse, copy and paste these two .ttf font files from the folder (that you left open) into this window here. The copy-paste operation installs the font into your computer.
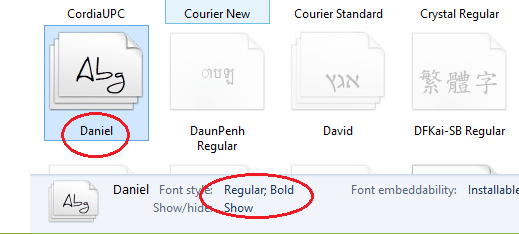 Once it shows up here, it is installed. Congratulations. As you can see, there are two versions of it: Regular and Bold.
4.2. Check Whether It Works.
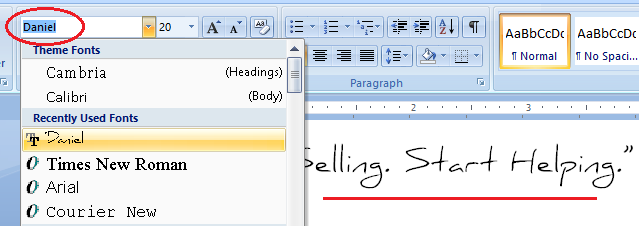
Let’s check if MS Word has a new font Daniel on its list. Open MS Word and check the drop-down list of fonts. If it is there, you can use it.
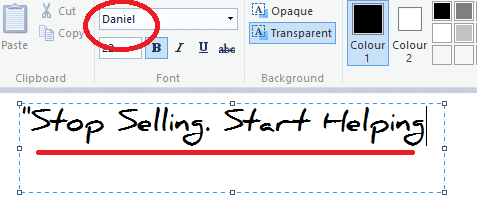
Let’s also check if it is in the list of fonts of the MS Paint:
So if you see and can use the font in the applications, then it’s done.
In the same way, you can install other TTF fonts that you want and find useful.
5. Design Your Images.
When you have installed the fonts, open your favorite image editing software (Microsoft Paint, Gimp, Paint.net are some excellent FREE options). Photoshop is probably the best one, but it is not free. Gimp is an excellent alternative to Photoshop, but it is relatively slow to open.
As for me, I clearly prefer Paint.net as it is light and fast.
Now you can use screenshots or download some free image backgrounds from the internet (like the imitation of a notebook page or Post-It) and design your cool and personal images.
After you save the image, all the text on it is converted into pixels, and everybody sees the image the same way. The image is not connected to a font file anymore, and you can safely use it on your website.
Imagine for looking for legit work-from-home opportunities and finding THIS when you go inside… WOW
Do it now. Sometimes ‘later’ becomes ‘never‘.
What About You?
So what other ways do you use to design your images? Please leave your thoughts in the comment section below.






 ARE YOU looking for ways to create a legit passive income online?