Do you want to have your own blog buttons (size, color, text on it, etc.) but don’t know how to make them?
If so, don’t worry. It’s not that difficult at all. In this step-by-step HowTo tutorial, I will show you the quick and easy way to make cool-looking blog buttons.
So here we go, “How to Make Blog Button.”
If you knew how to make $1200 a month online, from the comfort of your home, would you do the work?
…Well THIS is your chance
It’s FREE to get started, too (no credit card required). You’ll like that part…
1. Choose Right Colors for Your Button
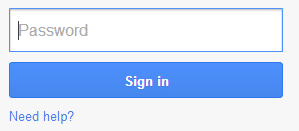
Of course, you can pick whatever colors you want. It’s up to you to choose. But did you know that large enterprises carry out extensive researches to find shades that convert the best? People respond to different colors and shades differently, and some colors get more clicks than others. Google, for example, tested 50 different shades of blue for its call to action button:
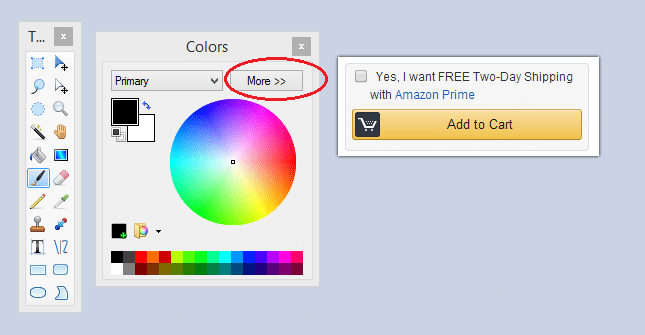
Below you can see Amazon’s call to action button. You can bet that they, too, have tested different colors and shades to find out which one converts the best.
Of course, it depends on the website’s overall design, but if these companies have already done their research, you may trust them and use the same colors that they do. Only… How do you know what colors they use?
Here’s a quick tip on how to find out.
2. Pick the Color Codes of Your Favorite Button
2.1. What do you need?
2.1.1. An image editor. If you don’t have it yet, I recommend downloading Paint.NET. It’s a simple, fast, and quite a powerful image editor.
 2.1.2. A snipping tool. The Print Screen button on your keyboard does the job too, but a snipping tool is handier. If you don’t have it already, download it. Just google “download snipping tool,” and you find one for your operating system. It’s a convenient tool to capture a portion of your screen and save it as an image. I use it extensively.
2.2. Pick the Color Codes
On the computer, there are tens of millions of colors and shades. It’s not enough to tell you that I want to use yellow or red or blue. There are tons of very similar shades of red, yellow, and blue. Each shade has a unique code to differentiate them, called a hex code, which starts with the #-sign. #0000000 is black, and #FFFFFF is white. All other colors are between these two values.
For this example, let’s use Amazon’s call to action button. Go to Amazon.com and pick a random product. Once you have chosen it, Amazon shows you its yellow Call to Action button “Add to Cart” on the window’s right side. Using your snippet tool, takes a snapshot of it and save it to your hard drive (I prefer .png file format).
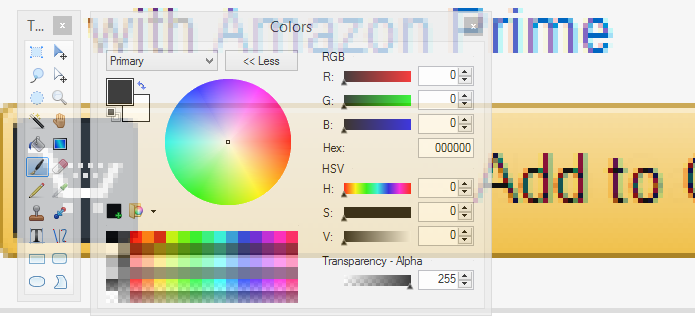
1. Let’s say you want to make your Call to Action button with the same colors that Amazon uses. Open the image file in the Paint.NET image editor. You see a toolbar, color bar, and your image. Click the “More” button in the Color bar to see its advanced options.
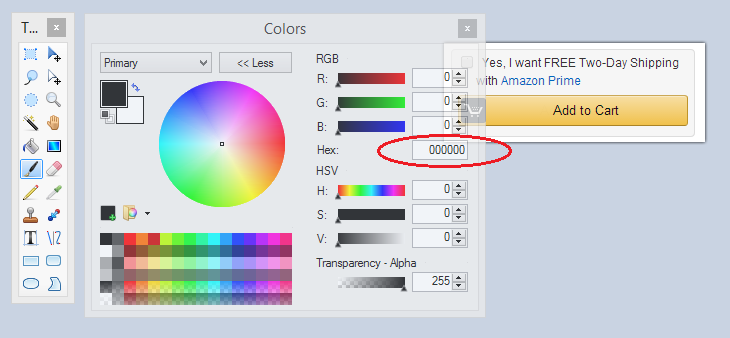
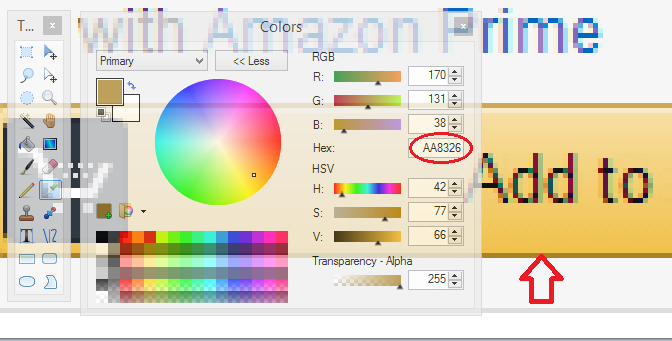
Advanced options reveal RGB values (red, green, and blue) and Hexacode (Hex field) of the chosen color. Right now, it shows the code of black: #000000 (it does not show the # sign, but usually hex code is written with the # sign). This Hex field is the place where you get the codes that you need.
2. Go to the main menu of Paint.NET and zoom in on the image so that it’s easier to pick the colors. You need three colors: 1 for lighter yellow (upper part of the button), darker yellow (lower part of the button), and the border color.
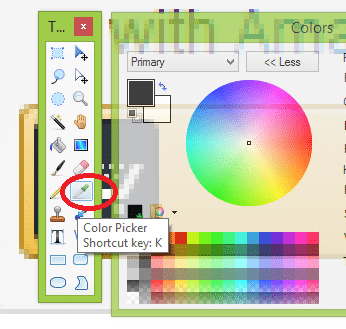
3. From the Paint.NET toolbar, choose a Color Picker tool. How does this device work? The image you click on picks the color of that pixel, its RGB values, and Hexacode. Try it out. Click somewhere on the image, and you see the results in the Colors bar.
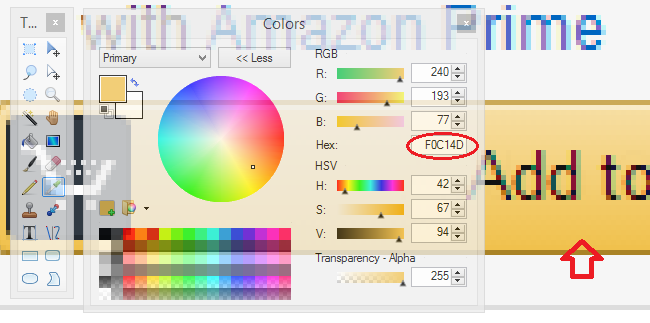
4. Now, move the tool to the lower part of the button and pick the color. You see that the Primary color in the Color bar changes into yellow, and Hexacode changes too. Because the button uses a gradient style, moving smoothly from darker to lighter shades, your code might differ from mine. But the color is the same. In my case, you see, the hexacode of the darker yellow is F0C14D. Write your code down.
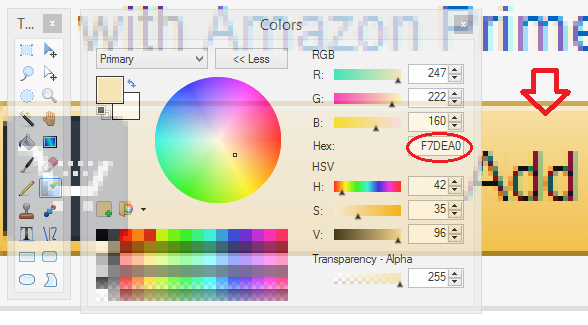
5. Now take the tool and pick a light yellow color, which is on the upper part of the button. Hex code changes again, and you want to write it down. In my case, it is F7DEA0.
6. Use the tool again to pick the color of the border. In my case, it is AA8326. Write your hex code down.
Now you have three shades and three hex codes that you need to make your button:
- light yellow: #F7DEA0
- dark yellow: #F0C14D
- Border: #AA8326
It’s enough right now, and you can start making a blog button.
3. Make Blog Button
1. Go to Da Button Factory website. That is a straightforward web page, which helps you create and download your blog buttons. You see that there are three sections. Toolbars are on the left and the right. The button that you design locates in the middle. There are also links to download your button images.
3.1. Left Side Toolbar
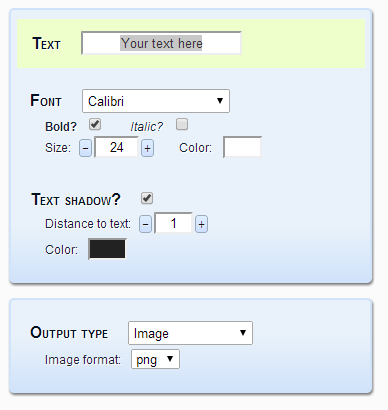
2. Type your text that you want to see on your button.
3. Choose font type and size. Also, choose if you want it to be in bold or italic; pick the text’s color and its shadow. You may leave all the fields with default values, except the text that you have to type.
4. The second window is about the file format. Choose what file format you want your button image to be. You can leave it as a default value.
3.2. Right side Toolbar
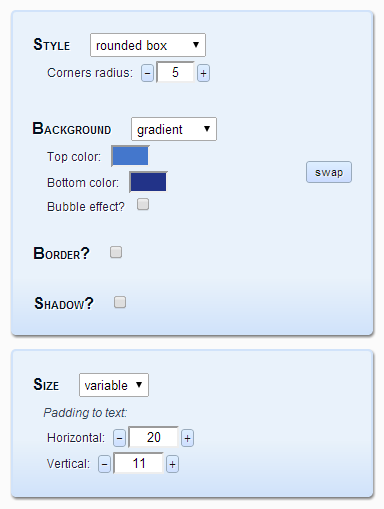
5. Style – here, you can choose if you want your button to be a rectangular, rounded, or round box. In the case of a rounded box, you can also select the corner radius.
6. Background lets you choose the background style (unicolored, two colors, gradient, or pyramid). Leave it gradient.
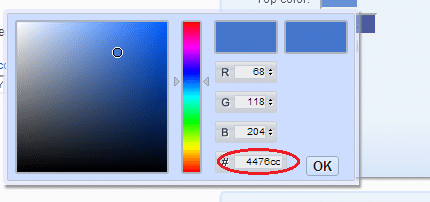
7. Top color – this is the place where you enter the previously picked hex code. Click on the rectangle with a light blue color. At the bottom, you see the field that has the #-sign. Replace the existing hex code with the code of light yellow that you found earlier. (only without #-sign). In my case, it was F7DEA0. Press OK.
8. Bottom color – Do the same with the Bottom color.
9. Border color – To change the border color, check the Border color box, and then you can change the hexacode of the border color.
3.3. Download your button
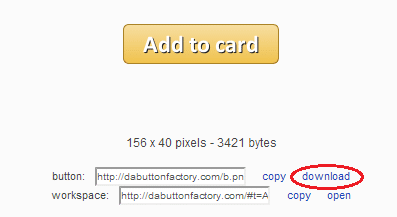
Congratulation! Your button is done and ready to be downloaded. As you see, it has the same colors as Amazon’s original call to action button. Only the text has a different style, but you can make it similar if you want. If you’re going to make some changes, just play with all the left and right parameters.
10. If you are happy with your button, just hit the download link and download it.
Imagine for looking for legit work-from-home opportunities and finding THIS when you go inside… WOW
Yes, the raw, sizzling beauty of passive income stream online. So click here now. Sometimes ‘later’ becomes ‘never ‘.
What About You?
What other ways do you know to make cool blog buttons?





 ARE YOU looking for ways to create a legit passive income online?