Do you want to know how many people have visited your website today, yesterday, last week, or month? Where did they come from? How did they find your site? What links did they click, etc.?
To analyze traffic to your website, you need a useful tool. Google Analytics is an excellent FREE tool to analyze almost everything that you want to know about the traffic that comes to your website.
Perhaps your question is: “How do I set up Google Analytics?”
Let me help you. This tutorial is for you. I go through the process step-by-step and help you set it up.
So let’s start.
If you want to know how you can make $1,200+ a month online from the comfort of your home – well this is your chance
It’s FREE to get started, too (no credit card required). You’ll like that part…
1. Tools You Need
- A website.
- A Google account. If you have it already, use that one. If you don’t, then create one.
2. Set Up Google Analytics
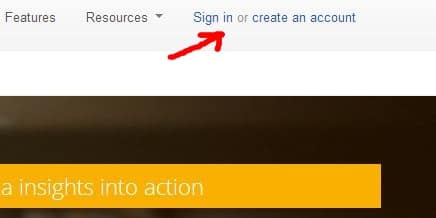
1. Go to www.google.com/analytics website. In the right upper corner, you find “Sign in” or “Create an account.” Log yourself in.
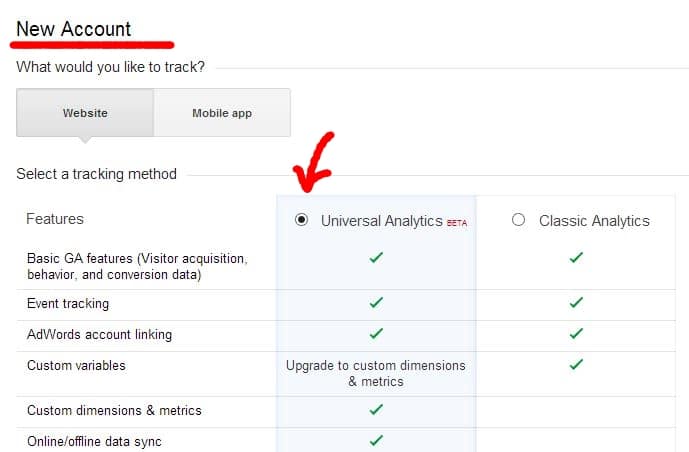
2. After logging in, you are asked to create a new Google Analytics account. Here you have two options: The old “Classic Analytics” option and the new “Universal Analytics,” which is still BETA. Choose the “Universal Analytics” option.
For later use, please remember or write it down that your account type is Universal Analytics. It is important because when in the future, you want to set up Event tracking, etc., then you are asked which Analytics you have. So you know – you have Universal Analytics.
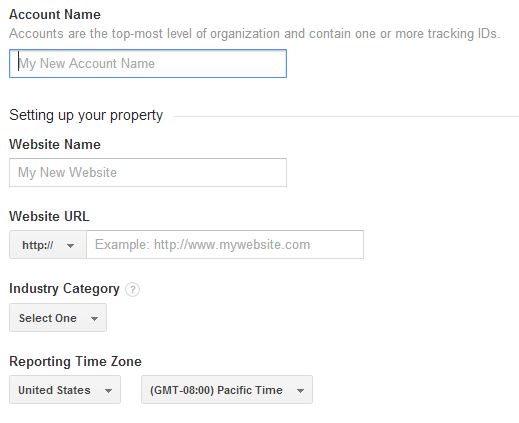
3. After scrolling down, you have to fill some blank cells:
- Account Name – here, you can type your First Name, for example. It’s not important right now, and you can change it later anyway.
- Website Name – For example: If my website is egonsarvreviews.com, I could write my website name as Honest Way To Make Money Online.
- Website URL – here, you have to write EXACT URL (without HTTP://). If your website URL includes www, then you have to add these too. Write the EXACT URL! For example: If your website URL is http://www.mysite2.com, then write www.mysite2.com
- Industry Category – here, you can choose a category that your website belongs to. Again, it is not essential to give an exact match, and you can change it anytime.
- Reporting Time Zone – find your country.
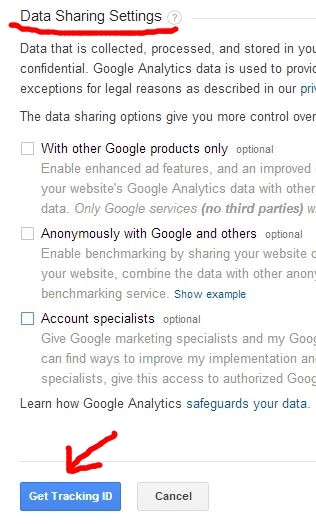
4. After filling the places and scrolling down, you find “Data Sharing Settings.” You are asked if you want to share your data. It is up to you to choose. In case you want to share, then toggle the checkboxes. If not, then leave them empty. I prefer to leave them blank.
After that, press the “Get Tracking ID” button.
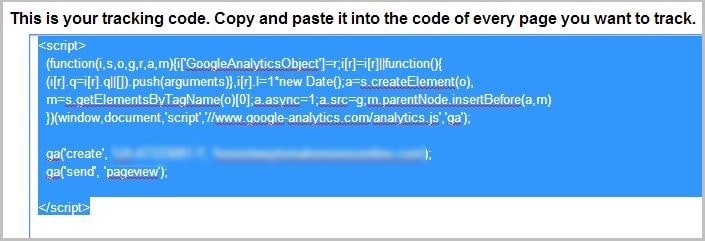
5. The window that opens shows your website’s Tracking ID and a short script called your “tracking code.” The picture should be like this:
6. You have to copy-paste your tracking code into the header of your website. Use your mouse or keyboard to select the whole script (tracking code) and then, using Ctrl-C or “copy”-function, copy it into a clipboard. Later you paste it into your website file.
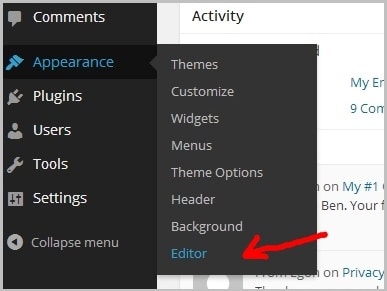
7. Now, you have to paste your tracking code into the right place on your website. If you have a WordPress website, then login to your WordPress account, open your website, and select Appearance – > Editor.
8. Once the Editor is opened, you see a Header section on the page’s right side. Click it.
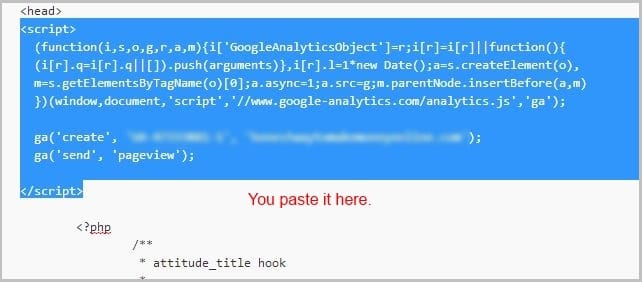
9. Find the HTML tag <head> and using Ctrl-V, paste your tracking code right after the <head> tag. Ensure that you don’t delete or change anything else on the file, or you may have fatal errors.
![]()
10. After adding your tracking code into the file, your updated Header should look like this:
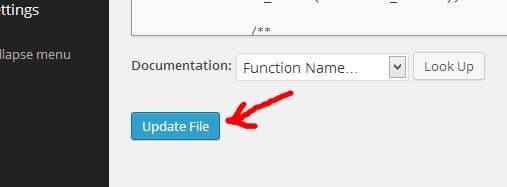
11. Press the “Update File.”
12 . Congrats! Google Analytics has now set up for your website. You can start analyzing incoming traffic to your website.
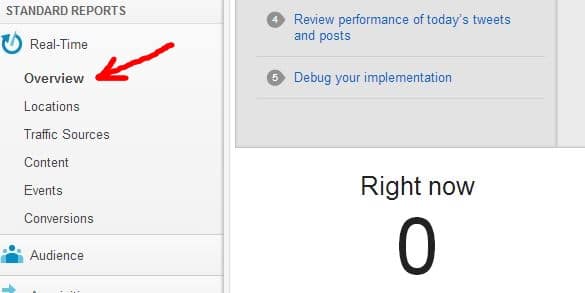
13. Log into your Google Analytics website again and find a “Real-Time” button from the left side menu. This option allows you to track your traffic in real-time.
14. Under “Real-time,” open “Overview.” It shows you how many people are visiting your website at the moment. If it is zero, as in this example, then there are no people visiting your site at the moment.
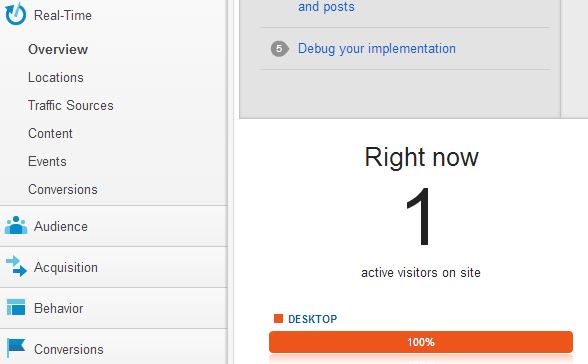
15. You can check your analytics tool right away – open a new browser window and locate your website. Once your website is opened, Google Analytics Real-Time Overview shows another person on your site. It also tells you where he comes from etc.
16. Play around and introduce yourself with the metrics provided here. You will find quite a few exciting things about your customers.
Google Analytics does not show you the previous data. It shows you from the moment that you activated it.
17. Google Analytics is a powerful tool with tons of options and metrics. To use everything efficiently, you have to learn much more. This tutorial was to help you set it up for your website and give you taste in how many ways you can analyze the traffic to your website.
If you’d rather make money than watch TV… Why not try this? It’s FREE to get started, too. You’ll like that part…
Why THIS is risk-free for you. Look closer and you’ll see why.
How About You?
Do you have questions or comments about setting up Google Analytics? Feel free to drop a comment below. I would love to hear from you.
Read also:
How to Add Favicon to Your Website
How to Set Up Google Authorship






 ARE YOU looking for ways to create a legit passive income online?